السبت، 2 نوفمبر 2013

Install VST Plugins in fl studio


1. Go to c:/program/image-line/FL8/Plugins/VST (default installation route)

2. Unzip your new VST plugin into that folder. If it’s an .exe file, just run it, and if it’s a .dll file just extract it.

3. Open FL and go to channels/add one/more..


4. Once there you’ll see all the available plugins. The ones with a box ticked with the letter F are active in your library of instruments already, and the ones with a blank box are not yet active. But for now, skip this for a few seconds.

5. Scroll down in that list of VST plugins until you hit the bottom. Press the refresh button and fast scan.


If you’ve done everything right you’ll get a note saying 1 or more plugins found, next to the refresh button.

6. Just tick that box next to the newly installed plugin (marked in red text) and voilá, it’s done!


How to install VST Effects in Fruity Loops


You can pretty much follow the above steps, as long as you don’t tick the boxes in the instrument window, because if you do it will not end up in the effects list but the instruments list and we don’t want that now do we? So, install the VST plugin like it’s normally done and then go to the mixer by pressing F9.

Once there head over to the effect section of the mixer(1,2,3,4,5,6,7,8) and press select/more…

Now all you have to do is to hit the refresh button once again and it will list the newly installed VST effect in red color. Tick that box and it’s installed.. in the right place :)

source : http://flstudio-collection.blogspot.com/2011/10/how-to-install-vst-plugins-to-fl-studio.html

how to layer your sounds ( rap )

Layer channel
To create a layer, add a Layer channel to your Step Sequencer. See below:

image

In the screenshot below you see my Step Sequencer. All I have at this stage is the Layer channel:

image

Now, the Layer channel itself is not a generator. You can hit the keys until dawn, it will not make any sound. What it can do however is trigger sounds in so called child channels (which are the generators). To demonstrate this, let’s add a few channels. See below:

image

The channels that I added can be found in the Browser under Packs Legacy Strings. See below:

image
Next, we will make our two new channels child channels of our Layer channel. You can do this by first selecting the Layer channel, right clicking the Channel selectors for the channels you want to assign…
image

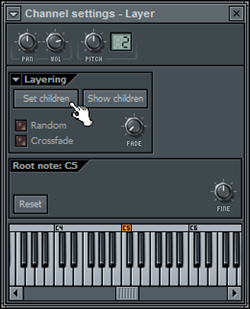
…and subsequently clicking the Set children button on the Channel settings dialog of the Layer channel. See below:

image
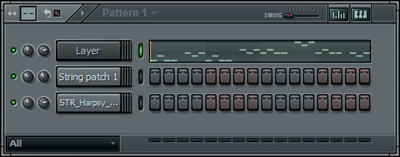
And that’s it! You have created your first layer. If you now select the Layer channel and hit some keys, you will hear the combined sound of the two channels. Also, you can create a pattern in the Layer channel, see below:

image

If you play this, you will hear the combined sound of the two channels.
Now, in case you want to adjust the sound you can adjust the indivual child channels including their channel volume and panning. For example, in the screenshot shown above you can see that I turned down the channel volume of the String patch 1 channel a bit. If you make changes to the Layer channel (e.g. the channel volume), then these changes are global and apply to the combined sound.
Layer channel settings
The Layer channel settings dialog is quite simple, yet has a few very interesting features. Via the Set children button you can assign channels to the Layer channel as explained above. Be careful with this button however. Each time you will click it the currently selected channels will be made child channels. Any other channel will not be part of the layer.
Via the Show children button you can see what channels are currently assigned to the Layer channel, in case you forgot.
If you select the Random switch only one of the child channels will be triggered at random. This is especially useful in case you have layered beats to generate a more dynamic result.
Selecting the Crossfade switch allows you to crossfade between the child channels via the Fade knob.
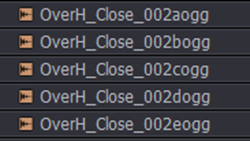
To illustrate the latter, add 5 channels with the following samples (you can find them under Packs Drumkit 3 in the Browser) to the Step Sequencer and assign them to your Layer channel:

image
image

Now, select the Crossfade switch as shown below:

image
If you now turn the Fade knob one child channel will fade into the other. Turning the knob from left to right will fade the channels from top to bottom. And because of the samples we have chosen the sound changes from a closed hi-hat to a more open one. Try this out by turning the knob and hitting some keys at the same time.
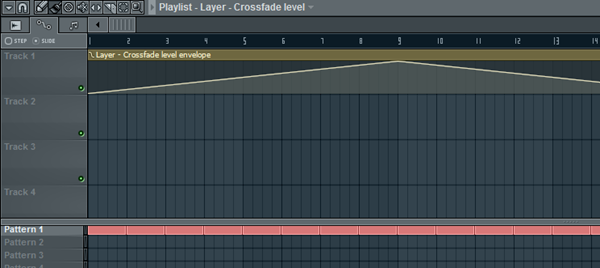
Now, the cool thing is that you can automate this knob as illustrated below:

image

Layer presets
FL Studio also comes with a number of layer presets, ready to drop into your projects. You can find them under Channel presets Layers in the Browser. See below:

image

Simpy drag them over to your Step Sequencer and you are ready to go!
Extra layer functions
There are a few addtional options available in the Extra layer options menu. See below:

image

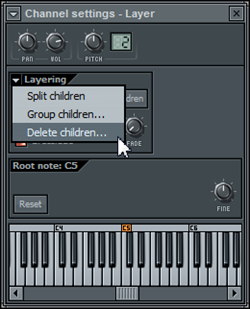
When using Split children, child channels are assigned to individual keys on the keyboard, starting from the root key of the Layer channel. This means that depending on the key you hit, a specific child channel will play. This is especially useful for creating drum kits or instruments where you have a different sample for each key.
When selecting Group children, the child channels will be assigned to a group for which you are asked to enter a name. I find this quite useful as the group remains even if you happen to mess up the layer. Via the Step Sequencer you can quickly filter channels to only show those that belong to a specific group.
Finally, Delete children will delete the child channels from the Step Sequencer.


Source : http://forbidden-fruity.blogspot.com/search/label/FL%20Studio%20Tutorial

FL Studio Tutorial 10 best tricks

Ghost Channels

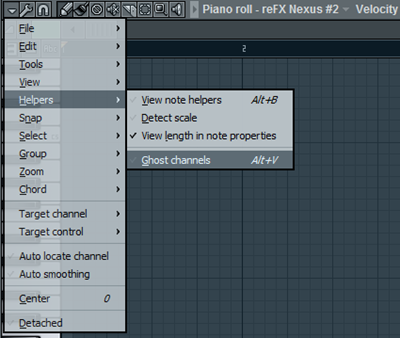
If you check the Ghost channels option in the Piano roll options menu, you will see the (greyed out) patterns from other channels that are in the same track. I find this especially useful when programming chord progressions using a specific scale as well as programming leads over a chord progression.
image

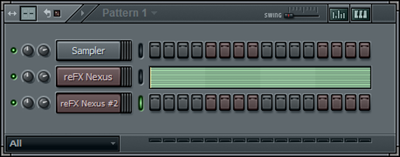
For example, if I load/program a scale in one channel (reFX Nexus)…
image

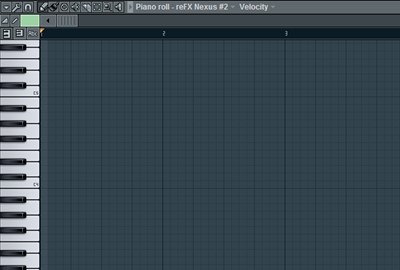
…open the Piano Roll for my second channel (reFX Nexus #2)…
image

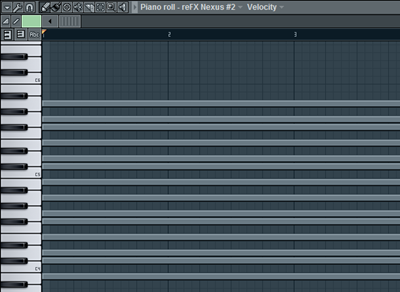
…and then select Helpers | Ghost channels in the Piano roll options menu, the Piano Roll view will be like this:
image

In other words, I can now ‘draw’ my pattern on top of the greyed out note events. In this way I know I stick to the notes that are ‘allowed’.

Adjusting note events

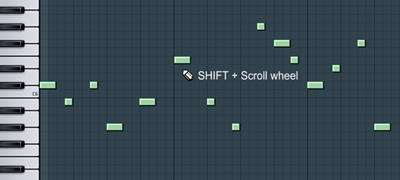
You can quickly adjust the horizontal position of your note event by moving the mouse pointer close to a note event and then using SHIFT + scroll wheel (or mouse wheel).
image
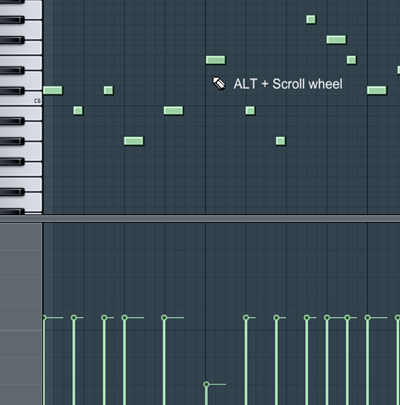
Likewise, by using ALT + scroll wheel you can adjust the currently selected note property (like velocity, panning, etc.).
image

Note that you can apply the same to a selection of note events.

Rescaling scores

You can rescale a score by selecting the pattern in the Piano Roll and resizing while holding down the SHIFT key.

image
This is an excellent trick for making a recorded score fit .

Using color groups

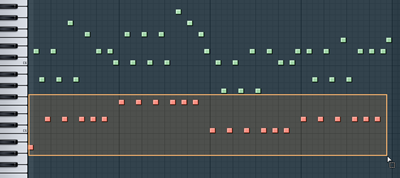
You can assign a color group/MIDI channel to note events. Once you have done this you can easily select all notes with a certain color group/MIDI channel.
First, select the note events you want to assign a color group:
image

Then, pick a color group:

image
Press ALT-C and the selected note events are assigned the color group you picked.
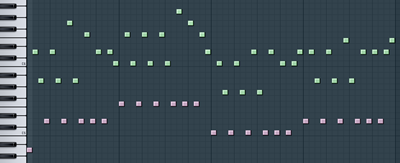
image
Now, to quickly select the note events with a given color group, select the color group (as shown above) and press SHIFT-C.

Undo

Just in case you wondered guys, CTRL-ALT-Z can be used for sequentially undoing multiple changes (CTRL-Z is only for undoing/redoing the last change).

Browser Snapshots

Open your favourite folder(s) in the Browser:
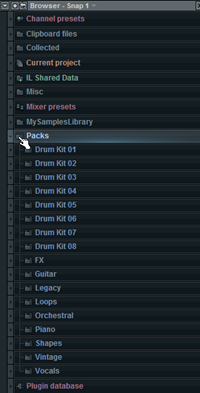

image
In the Current snapshot menu, select Frozen:
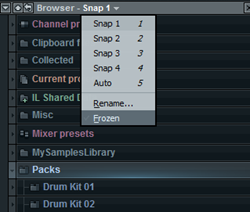
image 

If you want you can rename the snapshot by right-clicking the snapshot name (Snap 1 in the screenshot) and entering a new name:
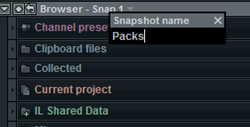
image

Now, regardless of the state of your Browser, if you press 1..5, the Browser shows the state assigned to that snapshot.

Selecting/deselecting note events

I am sure you know how to select note events. Using the Select tool you can simply draw a box around the notes you want to select or you can simply click a single note event to select it.
By holding down the SHIFT key while selecting you can add note events to your already selected note events.
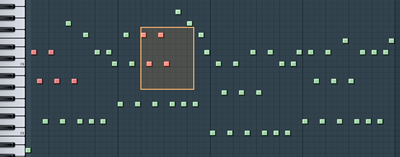
image
To deselect (subtract) note events from a selection, simply click on a selected note event (the one that you want to remove from the selection) and start drawing your box – still holding down the SHIFT key.
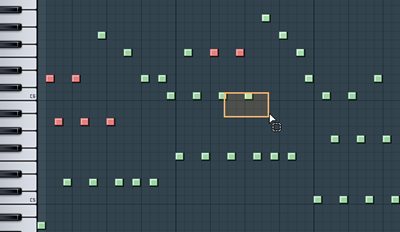
image

Transposing a score

There are several methods that you can use to quickly transpose a score. The most obvious one is simply selecting the score (or the note events you want to transpose) and move them vertically.
To move an entire score up or down one semitone, use SHIFT + UpArrow/DownArrow. Using CTRL+UpArrow/DownArrow will transpose the score up or down by 1 octave.

Using Markers

To create a marker select a number of bars…
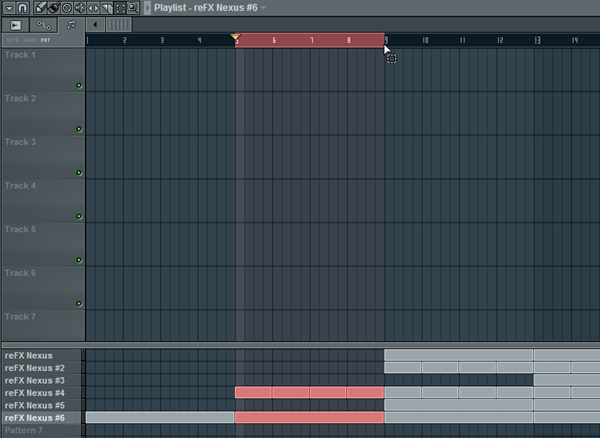
image

…press ALT-T (adds a marker to the beginning of the selected area) and enter the marker name:
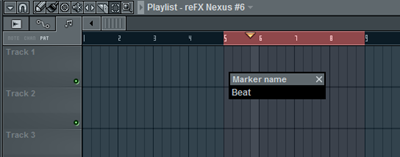
image

To jump between markers, simply press ‘.’ (dot) on the numpad.
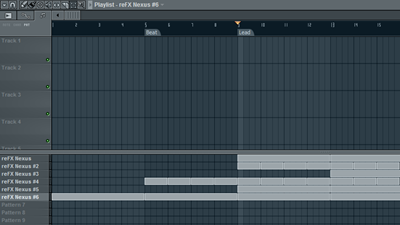
image

To jump between markers and select the bars between the selected marker and the next, use CTRL+’.’ (again on the numpad).
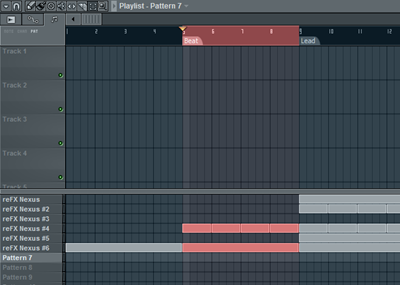
image


source ; http://forbidden-fruity.blogspot.com/2010/04/10-cool-fl-studio-tricks-you-arent.html

الاثنين، 28 أكتوبر 2013

الأحد، 27 أكتوبر 2013

افضل 10 دي جي في عالم 2013 top 10 dj

                                                    -1       Armin Van Buuren
في المرتبة الاولى Armin Van Buuren
                                                  2- Tiesto 

                                                 3-Avicii 

                                          4-David Guetta
                                            5-Deadmau5 

                                6-Hardwell
                                   7- Dash Berlin
                                     8-Above & Beyond
                                       9-afrojack
                                       10-Skrillex


تحميل اضافة Alphatron plugins free Download مجانا vst

                                                           السلام عليكم و رحمة الله و بركته    


Download  : here