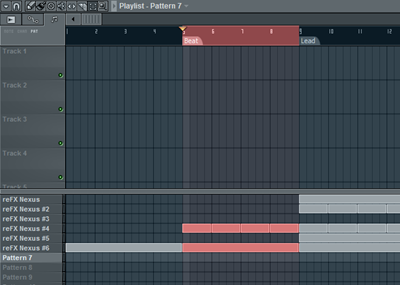
Layer channel
To create a layer, add a Layer channel to your Step Sequencer. See below:

In the screenshot below you see my Step Sequencer. All I have at this stage is the Layer channel:

Now, the Layer channel itself is not a generator. You can hit the keys until dawn, it will not make any sound. What it can do however is trigger sounds in so called child channels (which are the generators). To demonstrate this, let’s add a few channels. See below:

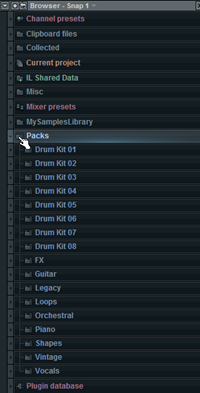
The channels that I added can be found in the Browser under Packs Legacy Strings. See below:

Next, we will make our two new channels child channels of our Layer channel. You can do this by first selecting the Layer channel, right clicking the Channel selectors for the channels you want to assign…

…and subsequently clicking the Set children button on the Channel settings dialog of the Layer channel. See below:
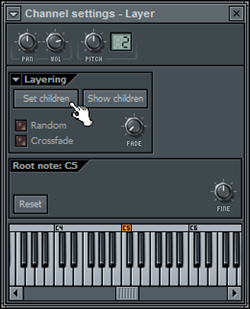
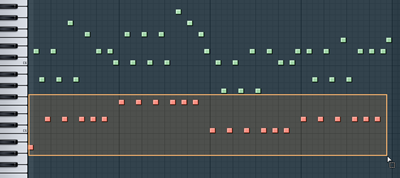
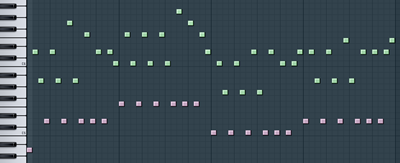
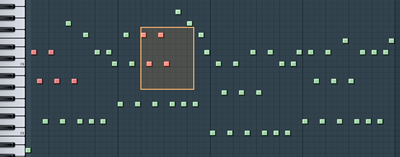
And that’s it! You have created your first layer. If you now select the Layer channel and hit some keys, you will hear the combined sound of the two channels. Also, you can create a pattern in the Layer channel, see below:
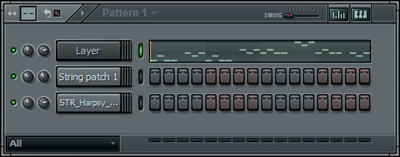
If you play this, you will hear the combined sound of the two channels.
Now, in case you want to adjust the sound you can adjust the indivual child channels including their channel volume and panning. For example, in the screenshot shown above you can see that I turned down the channel volume of the String patch 1 channel a bit. If you make changes to the Layer channel (e.g. the channel volume), then these changes are global and apply to the combined sound.
Layer channel settings
The Layer channel settings dialog is quite simple, yet has a few very interesting features. Via the Set children button you can assign channels to the Layer channel as explained above. Be careful with this button however. Each time you will click it the currently selected channels will be made child channels. Any other channel will not be part of the layer.
Via the Show children button you can see what channels are currently assigned to the Layer channel, in case you forgot.
If you select the Random switch only one of the child channels will be triggered at random. This is especially useful in case you have layered beats to generate a more dynamic result.
Selecting the Crossfade switch allows you to crossfade between the child channels via the Fade knob.
To illustrate the latter, add 5 channels with the following samples (you can find them under Packs Drumkit 3 in the Browser) to the Step Sequencer and assign them to your Layer channel:
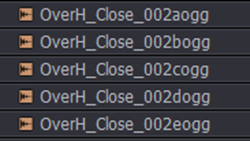

Now, select the Crossfade switch as shown below:

If you now turn the Fade knob one child channel will fade into the other. Turning the knob from left to right will fade the channels from top to bottom. And because of the samples we have chosen the sound changes from a closed hi-hat to a more open one. Try this out by turning the knob and hitting some keys at the same time.
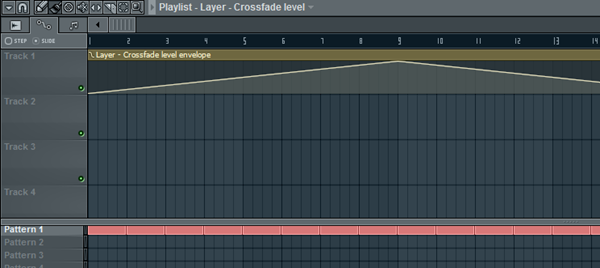
Now, the cool thing is that you can automate this knob as illustrated below:
Layer presets
FL Studio also comes with a number of layer presets, ready to drop into your projects. You can find them under Channel presets Layers in the Browser. See below:

Simpy drag them over to your Step Sequencer and you are ready to go!
Extra layer functions
There are a few addtional options available in the Extra layer options menu. See below:
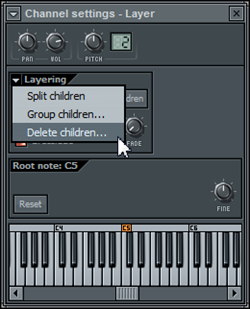
When using Split children, child channels are assigned to individual keys on the keyboard, starting from the root key of the Layer channel. This means that depending on the key you hit, a specific child channel will play. This is especially useful for creating drum kits or instruments where you have a different sample for each key.
When selecting Group children, the child channels will be assigned to a group for which you are asked to enter a name. I find this quite useful as the group remains even if you happen to mess up the layer. Via the Step Sequencer you can quickly filter channels to only show those that belong to a specific group.
Finally, Delete children will delete the child channels from the Step Sequencer.
Source : http://forbidden-fruity.blogspot.com/search/label/FL%20Studio%20Tutorial
To create a layer, add a Layer channel to your Step Sequencer. See below:

In the screenshot below you see my Step Sequencer. All I have at this stage is the Layer channel:

Now, the Layer channel itself is not a generator. You can hit the keys until dawn, it will not make any sound. What it can do however is trigger sounds in so called child channels (which are the generators). To demonstrate this, let’s add a few channels. See below:

The channels that I added can be found in the Browser under Packs Legacy Strings. See below:

Next, we will make our two new channels child channels of our Layer channel. You can do this by first selecting the Layer channel, right clicking the Channel selectors for the channels you want to assign…

…and subsequently clicking the Set children button on the Channel settings dialog of the Layer channel. See below:

And that’s it! You have created your first layer. If you now select the Layer channel and hit some keys, you will hear the combined sound of the two channels. Also, you can create a pattern in the Layer channel, see below:

If you play this, you will hear the combined sound of the two channels.
Now, in case you want to adjust the sound you can adjust the indivual child channels including their channel volume and panning. For example, in the screenshot shown above you can see that I turned down the channel volume of the String patch 1 channel a bit. If you make changes to the Layer channel (e.g. the channel volume), then these changes are global and apply to the combined sound.
Layer channel settings
The Layer channel settings dialog is quite simple, yet has a few very interesting features. Via the Set children button you can assign channels to the Layer channel as explained above. Be careful with this button however. Each time you will click it the currently selected channels will be made child channels. Any other channel will not be part of the layer.
Via the Show children button you can see what channels are currently assigned to the Layer channel, in case you forgot.
If you select the Random switch only one of the child channels will be triggered at random. This is especially useful in case you have layered beats to generate a more dynamic result.
Selecting the Crossfade switch allows you to crossfade between the child channels via the Fade knob.
To illustrate the latter, add 5 channels with the following samples (you can find them under Packs Drumkit 3 in the Browser) to the Step Sequencer and assign them to your Layer channel:


Now, select the Crossfade switch as shown below:

If you now turn the Fade knob one child channel will fade into the other. Turning the knob from left to right will fade the channels from top to bottom. And because of the samples we have chosen the sound changes from a closed hi-hat to a more open one. Try this out by turning the knob and hitting some keys at the same time.
Now, the cool thing is that you can automate this knob as illustrated below:

Layer presets
FL Studio also comes with a number of layer presets, ready to drop into your projects. You can find them under Channel presets Layers in the Browser. See below:

Simpy drag them over to your Step Sequencer and you are ready to go!
Extra layer functions
There are a few addtional options available in the Extra layer options menu. See below:

When using Split children, child channels are assigned to individual keys on the keyboard, starting from the root key of the Layer channel. This means that depending on the key you hit, a specific child channel will play. This is especially useful for creating drum kits or instruments where you have a different sample for each key.
When selecting Group children, the child channels will be assigned to a group for which you are asked to enter a name. I find this quite useful as the group remains even if you happen to mess up the layer. Via the Step Sequencer you can quickly filter channels to only show those that belong to a specific group.
Finally, Delete children will delete the child channels from the Step Sequencer.
Source : http://forbidden-fruity.blogspot.com/search/label/FL%20Studio%20Tutorial
